Local Flooring Company: What to Expect During Hardwood Flooring Installation
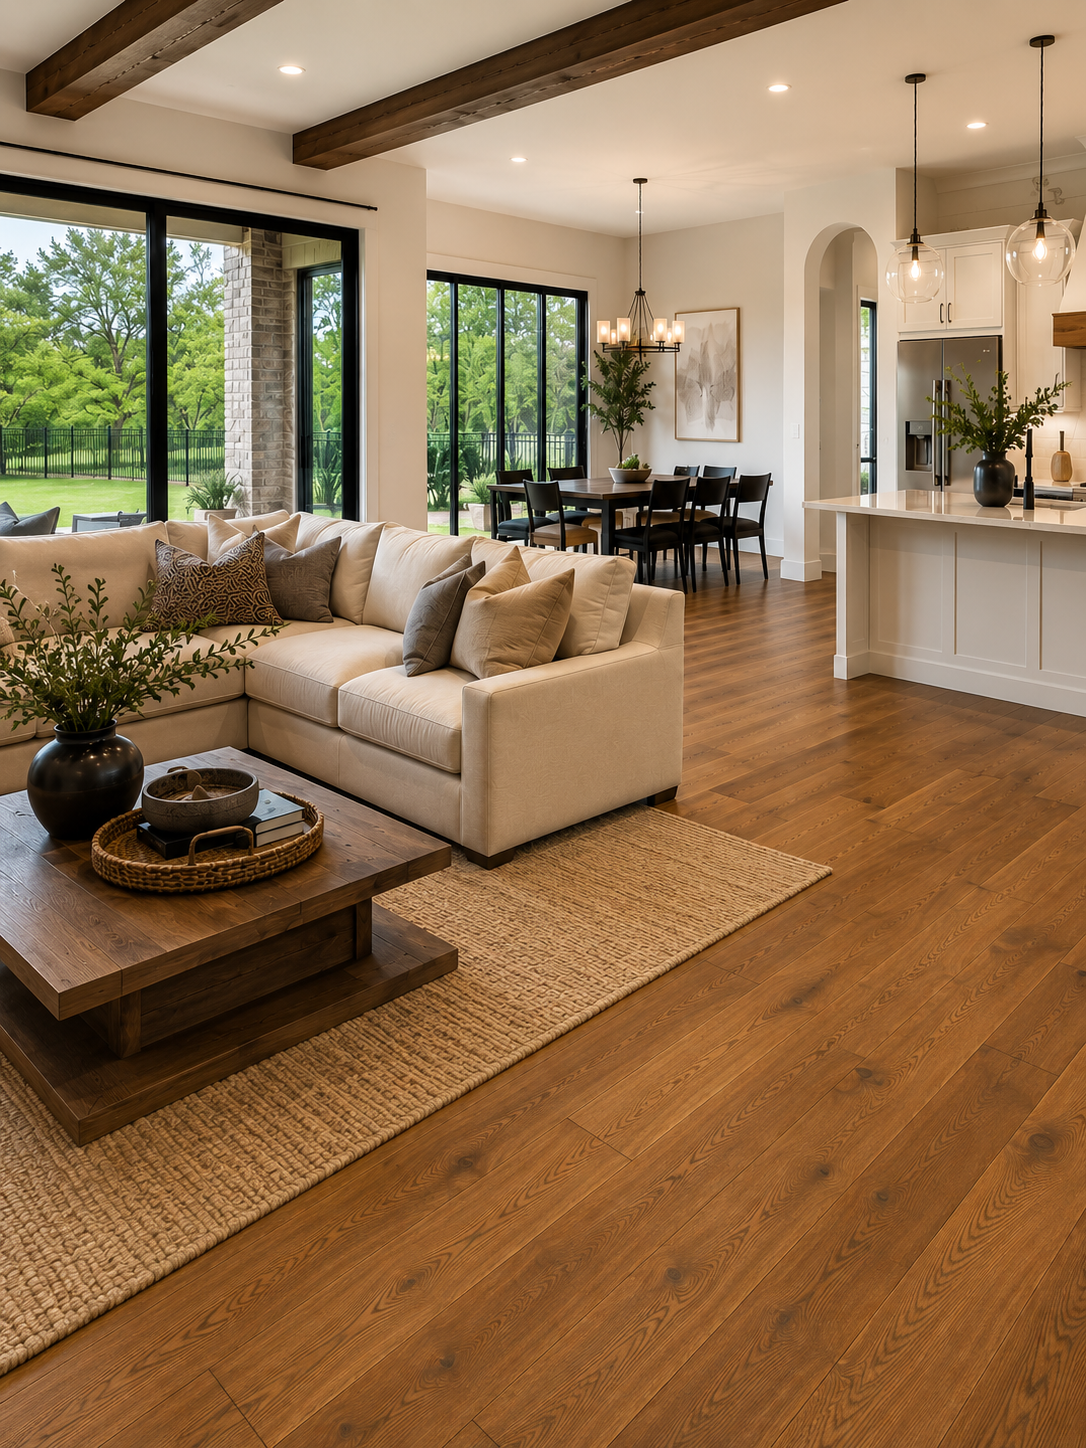
Upgrading to hardwood floors is one of the most rewarding investments for your home. The elegance, durability, and warmth of natural wood transform any living space. While the result is spectacular, the journey can feel overwhelming. Partnering with a reputable local flooring company ensures the process goes smoothly, but understanding the timeline yourself provides invaluable peace of mind.
Knowing what to expect during installation minimizes daily disruption and helps you prepare your household. From material delivery to the final finish drying, the timeline involves precise steps. Hardwood installation is a multi-day event requiring patience and professional expertise. This guide walks you through the standard phases, detailing the sights and stages you will experience as your floors become reality.
Preparing Your Home: The Essential Steps Before Installation
The success of your new hardwood floors relies heavily on the preparation phase before a single plank is secured. A professional local flooring company will require the target area to be completely cleared of furniture, rugs, and personal items. You should also remove fragile objects from adjacent rooms, as installation vibrations can shake items off shelves. These proactive measures protect your belongings and create a safe work zone.
Once the room is cleared, the wood must be delivered for a crucial process known as acclimatization. Hardwood is a natural, porous material that expands and contracts based on temperature and humidity. To prevent future buckling, uninstalled planks must sit in the designated room for several days to adjust to your specific climate. Skipping this waiting period is a mistake professionals strictly avoid.
While the wood acclimates, the installation team focuses heavily on the subfloor, the foundation for your new investment. Existing flooring must be carefully removed, revealing the subfloor beneath. This layer must be meticulously inspected, leveled, and repaired, ensuring no structural issues remain. A perfectly flat, clean subfloor is absolutely non-negotiable for a flawless hardwood installation that will stand the test of time.
It is also important to recognize the massive scale of residential flooring upgrades happening right now. According to Futuremarketinsights.com, the residential sector continues to lead as the biggest application category, holding a 49.7% share of the revenue due to the ongoing growth in urban housing. Because homeowners are actively investing in these upgrades, professional installers are incredibly efficient at moving through preparatory phases, keeping your project firmly on schedule.
Executing the Project: The Intricate Process of Placing Planks
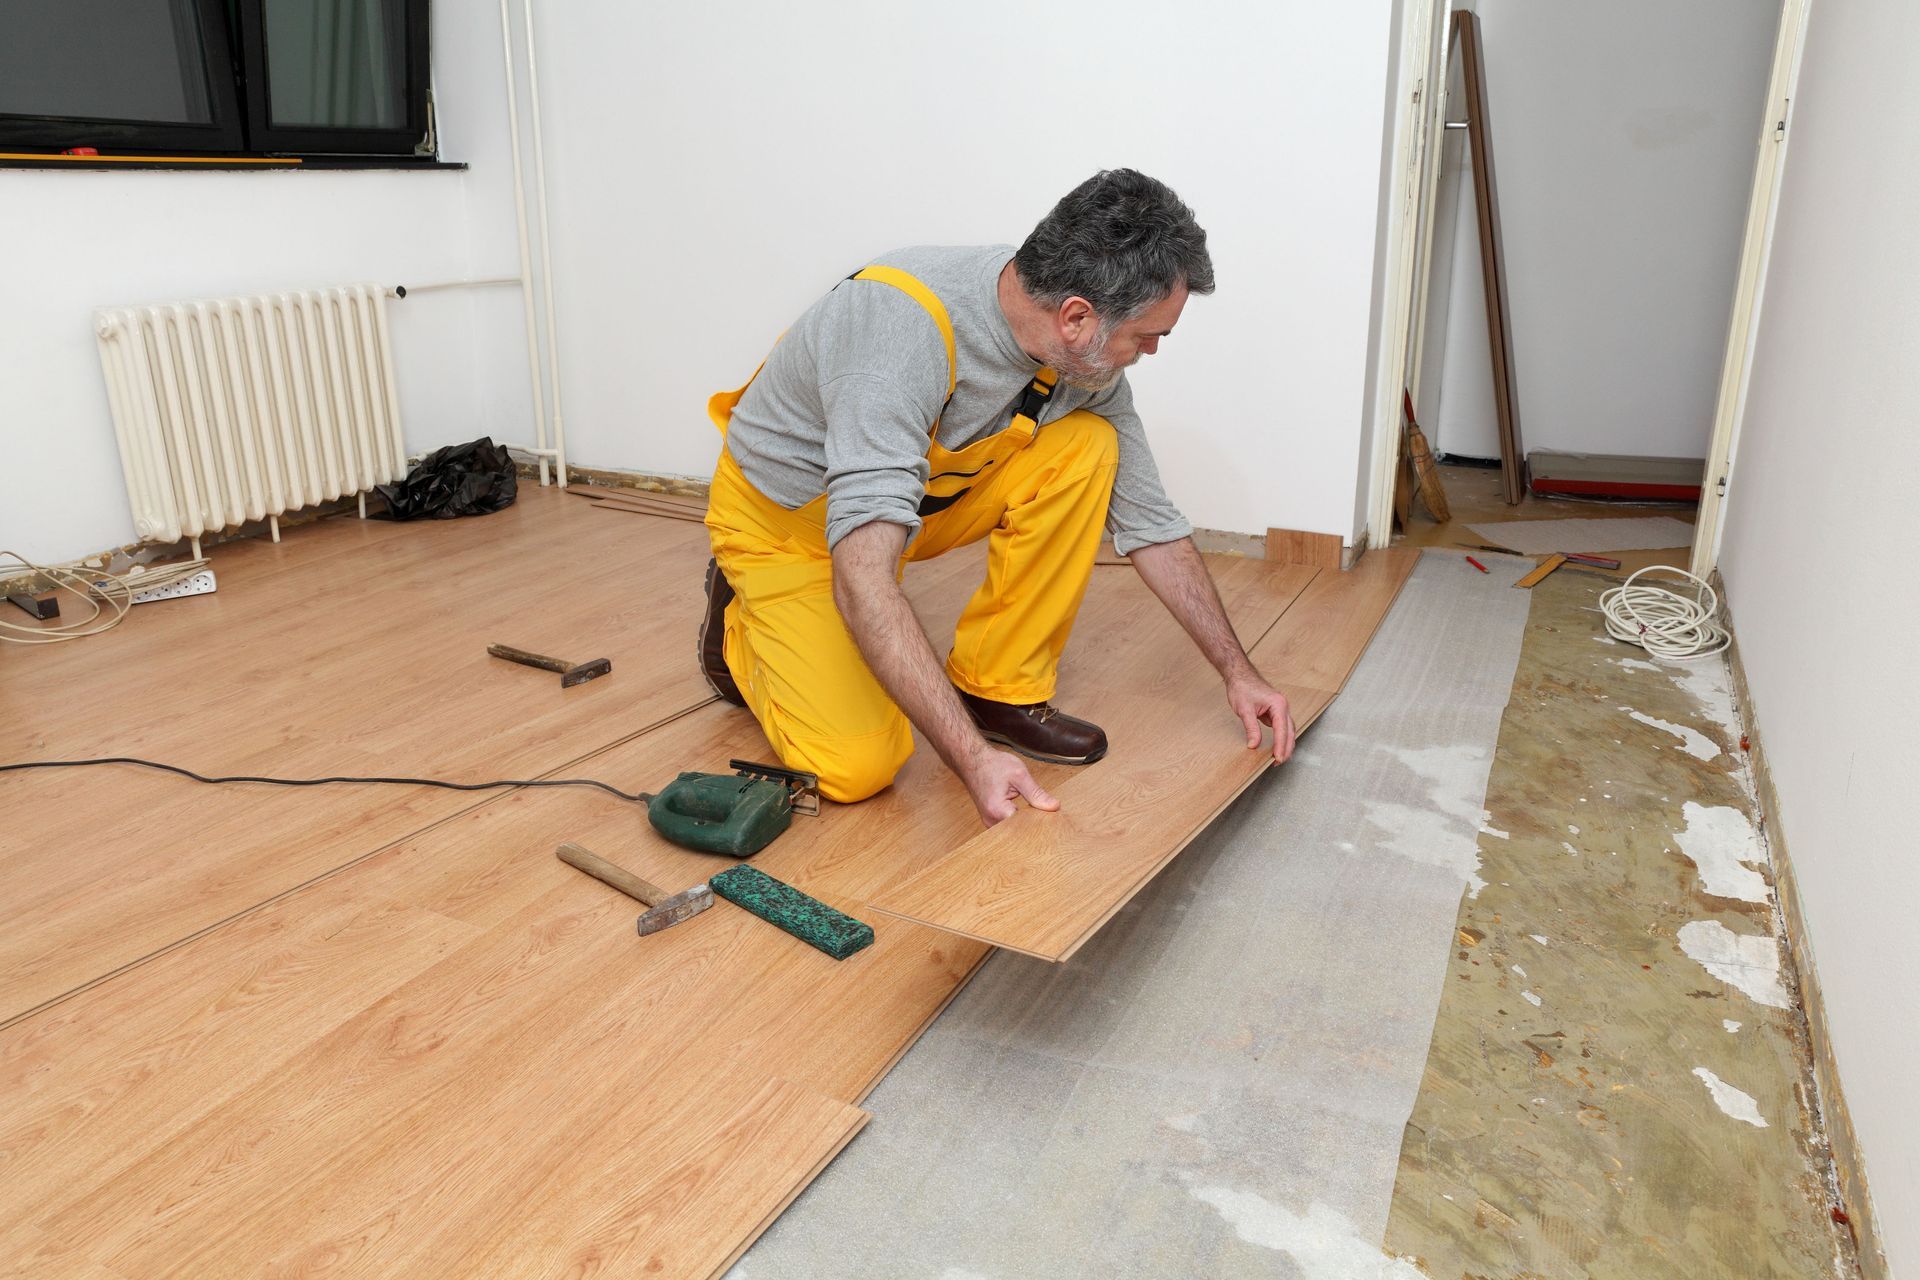
With preparation complete, the actual installation of the hardwood begins, changing your space hour by hour. The team starts by establishing a straight baseline, usually along the longest visible wall. This initial row sets the trajectory for the entire floor, meaning it must be measured with absolute precision. Any slight deviation at this starting point compounds into noticeable crookedness by the time the crew finishes.
During this phase, expect a significant increase in noise and activity throughout your home. The constant sounds of air compressors humming, pneumatic nailers firing, and power saws cutting oak will fill the air. Dust is an inevitable byproduct of cutting planks to fit the contours of your walls. Most teams set up cutting stations outside or in a garage, but some sawdust invariably enters.
The method used to secure the wood depends entirely on the flooring type and the nature of your subfloor. Solid hardwood is typically nailed or stapled into a wooden subfloor, while engineered wood might be glued down over concrete. Your chosen local flooring company will have determined the optimal fastening method previously. Watching installers rhythmically place and secure each board is a fascinating display of craftsmanship.
As the installation nears the edges of the room and tricky obstacles like fireplace hearths, the pace naturally slows down. The installers must make intricate, custom cuts to ensure the wood fits snugly around these permanent fixtures without leaving awkward gaps. This detail-oriented work requires immense patience and an experienced eye, demonstrating exactly why hiring seasoned professionals is superior to attempting a risky project yourself.
Finishing the Surface: The Detailed Work of Sanding and Sealing
If you opted for pre-finished hardwood, your installation is nearly complete once the planks are laid down. However, if you chose site-finished hardwood, the project now enters the critical sanding and finishing stage. The raw, newly installed floor undergoes multiple passes with heavy-duty sanding machines, starting with coarse grits. This process removes slight height differences between the boards, creating a completely seamless, smooth surface ready for coating.
It is worth noting that sanding generates an incredible amount of fine dust that can linger. A reputable local flooring company will utilize advanced dust containment systems, attaching industrial vacuums directly to their sanders. Despite these modern precautions, you should still expect to do a thorough dusting once the project is wrapped up. Sealing off ductwork and adjacent rooms with plastic sheeting is highly recommended.
After the floor is vacuumed and wiped down, the staining process begins. If you choose to alter the natural color of the wood, installers will apply the stain by hand, wiping off the excess to achieve a uniform hue. This is the moment when the floor truly comes to life, highlighting the gorgeous natural grain patterns. The stain must then be left alone to dry, usually taking twenty-four hours.
The final crucial step in this phase is the application of the protective polyurethane finish, shielding the wood from daily wear and tear. Typically, installers apply two to three coats of finish, waiting for each layer to dry before lightly buffing. During this time, the house will likely smell strongly of chemicals, and you absolutely cannot walk on the floors. Many homeowners choose to stay elsewhere during the application.
Reviewing the Results: The Final Inspection and Maintenance Advice
Once the final coat of finish has cured to a safe, walkable state, the project enters its concluding phase. Your local flooring company will schedule a comprehensive final walkthrough with you to inspect the completed work. This is your opportunity to examine the floors closely in natural light, checking for any missed spots or areas of concern. The installers want you to be absolutely thrilled with the result.
Alongside the final inspection of the floor itself, the crew will wrap up finishing touches around the room's perimeter. This involves reinstalling baseboards, shoe molding, or quarter-round trim to elegantly cover the necessary expansion gap left between the hardwood and the walls. They will also install transition strips in doorways where the new hardwood meets different flooring. These carpentry details give the room a polished, cohesive appearance.
Before the installers pack up their tools and depart, they should provide you with specific maintenance instructions. Caring for hardwood requires a different approach than cleaning tile; excessive moisture and harsh chemicals are absolute enemies of wood. You will likely be instructed to use only specialized, pH-neutral hardwood floor cleaners and a microfiber mop. Adhering strictly to these guidelines is vital for protecting the finish and warranty.
Finally, you will need to practice patience before moving heavy furniture back into the freshly renovated space. While floors might feel dry to the touch within a day, the underlying finish can take up to a full month to cure completely. You should wait several days before placing rugs down or moving heavy sofas. Remember to attach protective felt pads to furniture legs to prevent tragic scratching.
Navigating a hardwood flooring installation requires a combination of logistical preparation, patience with the process, and a clear understanding of the timeline. From the noisy days of demolition to the strong odors associated with sanding and sealing, a major flooring project temporarily turns your home into a construction zone. However, relying on the expertise of an experienced local flooring company dramatically reduces the stress and hassle. Ready to transform your home with stunning new hardwood floors? Contact Texas Pride Custom Floors today and let a dedicated local flooring company bring your vision to life with a seamless, stress-free installation process.
Share On: